There’s an old saying I just made up, it goes “a man has a problem. Give him a solution, now he has two problems”, and that’s how I felt when I came across the LilyGo T5, a beautiful e-ink display with an ESP32 microprocessor and an 18650 battery holder.
I needed to find something to make with it.
The idea
I realized that one thing that’s missing from my life right now is more time pressure. I have a job, which got me most of the way there, but I’m bad at remembering the time of each of the twenty meetings I have every day. I really needed something that would allow me to see my daily calendar at a glance, and I realized that a 4.7” e-ink screen was the perfect thing for that use case, so I quickly started working on making this a reality.
The result was…
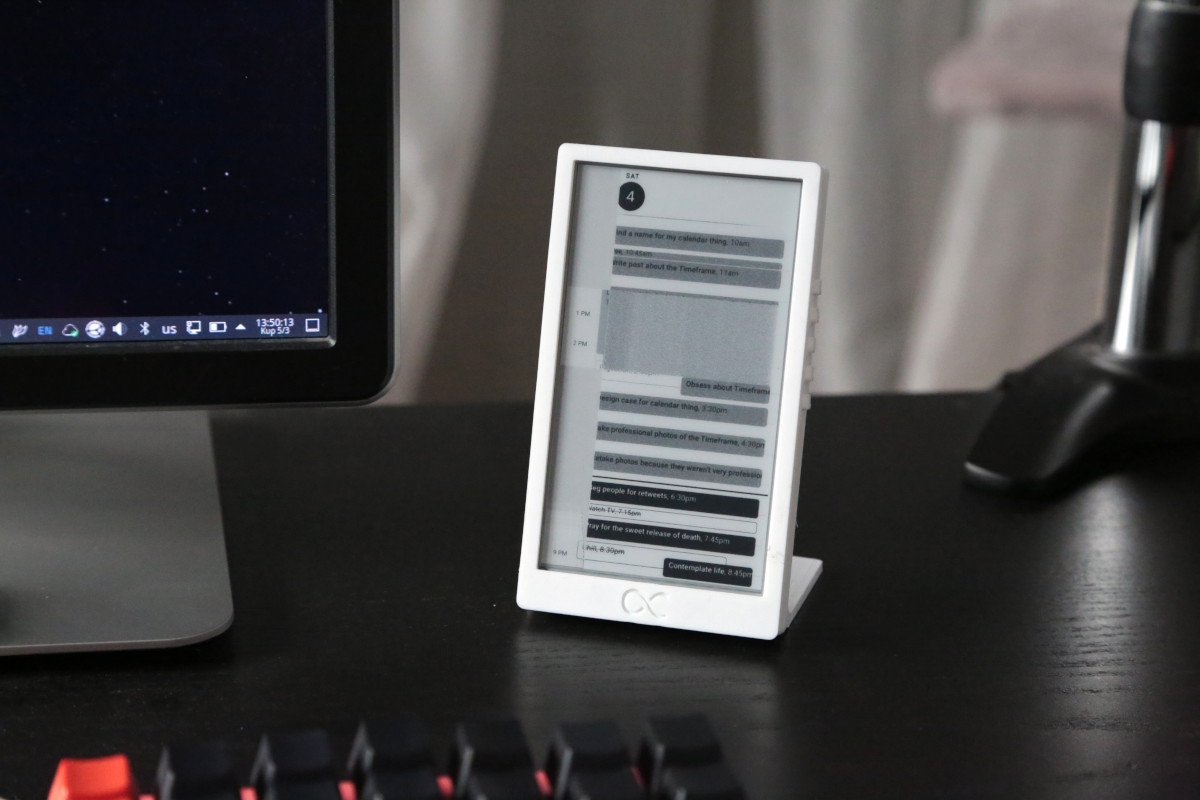
The Timeframe
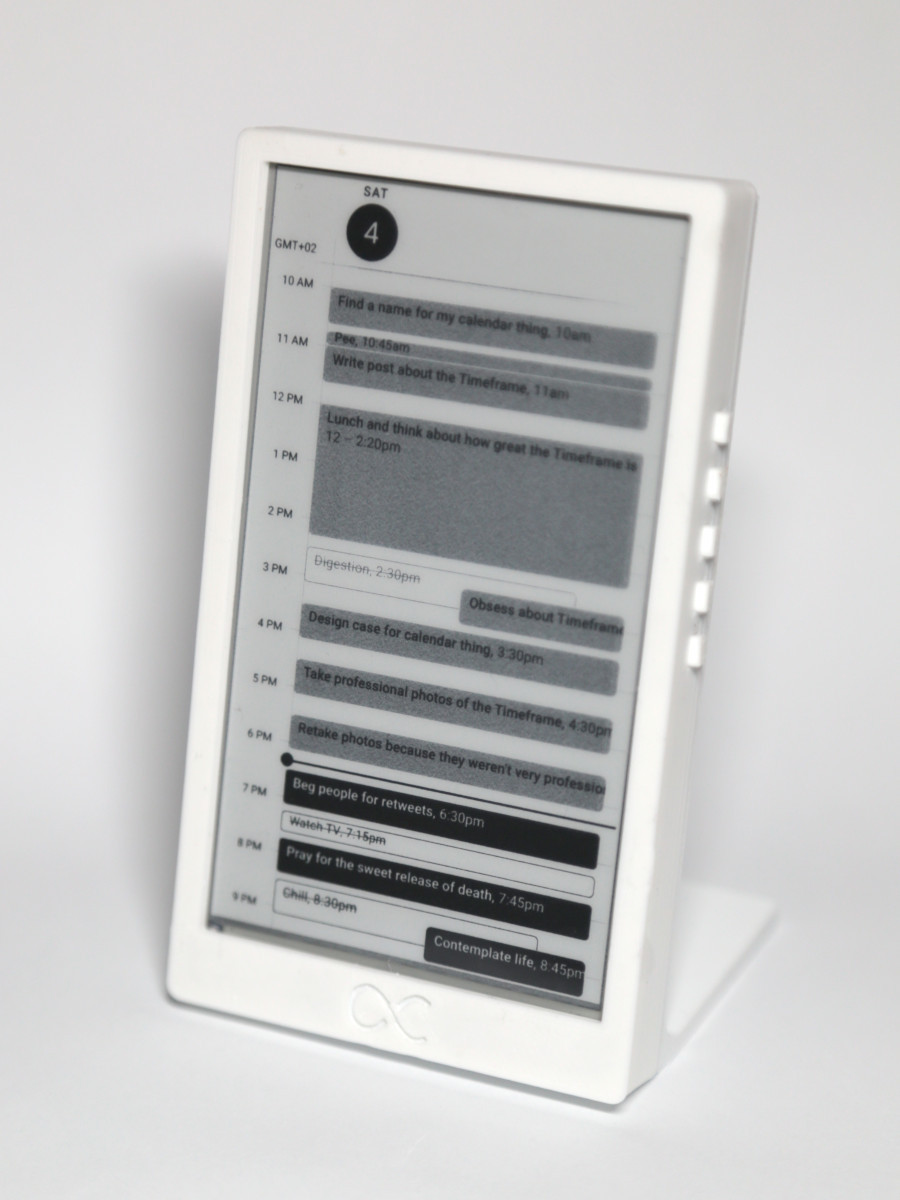
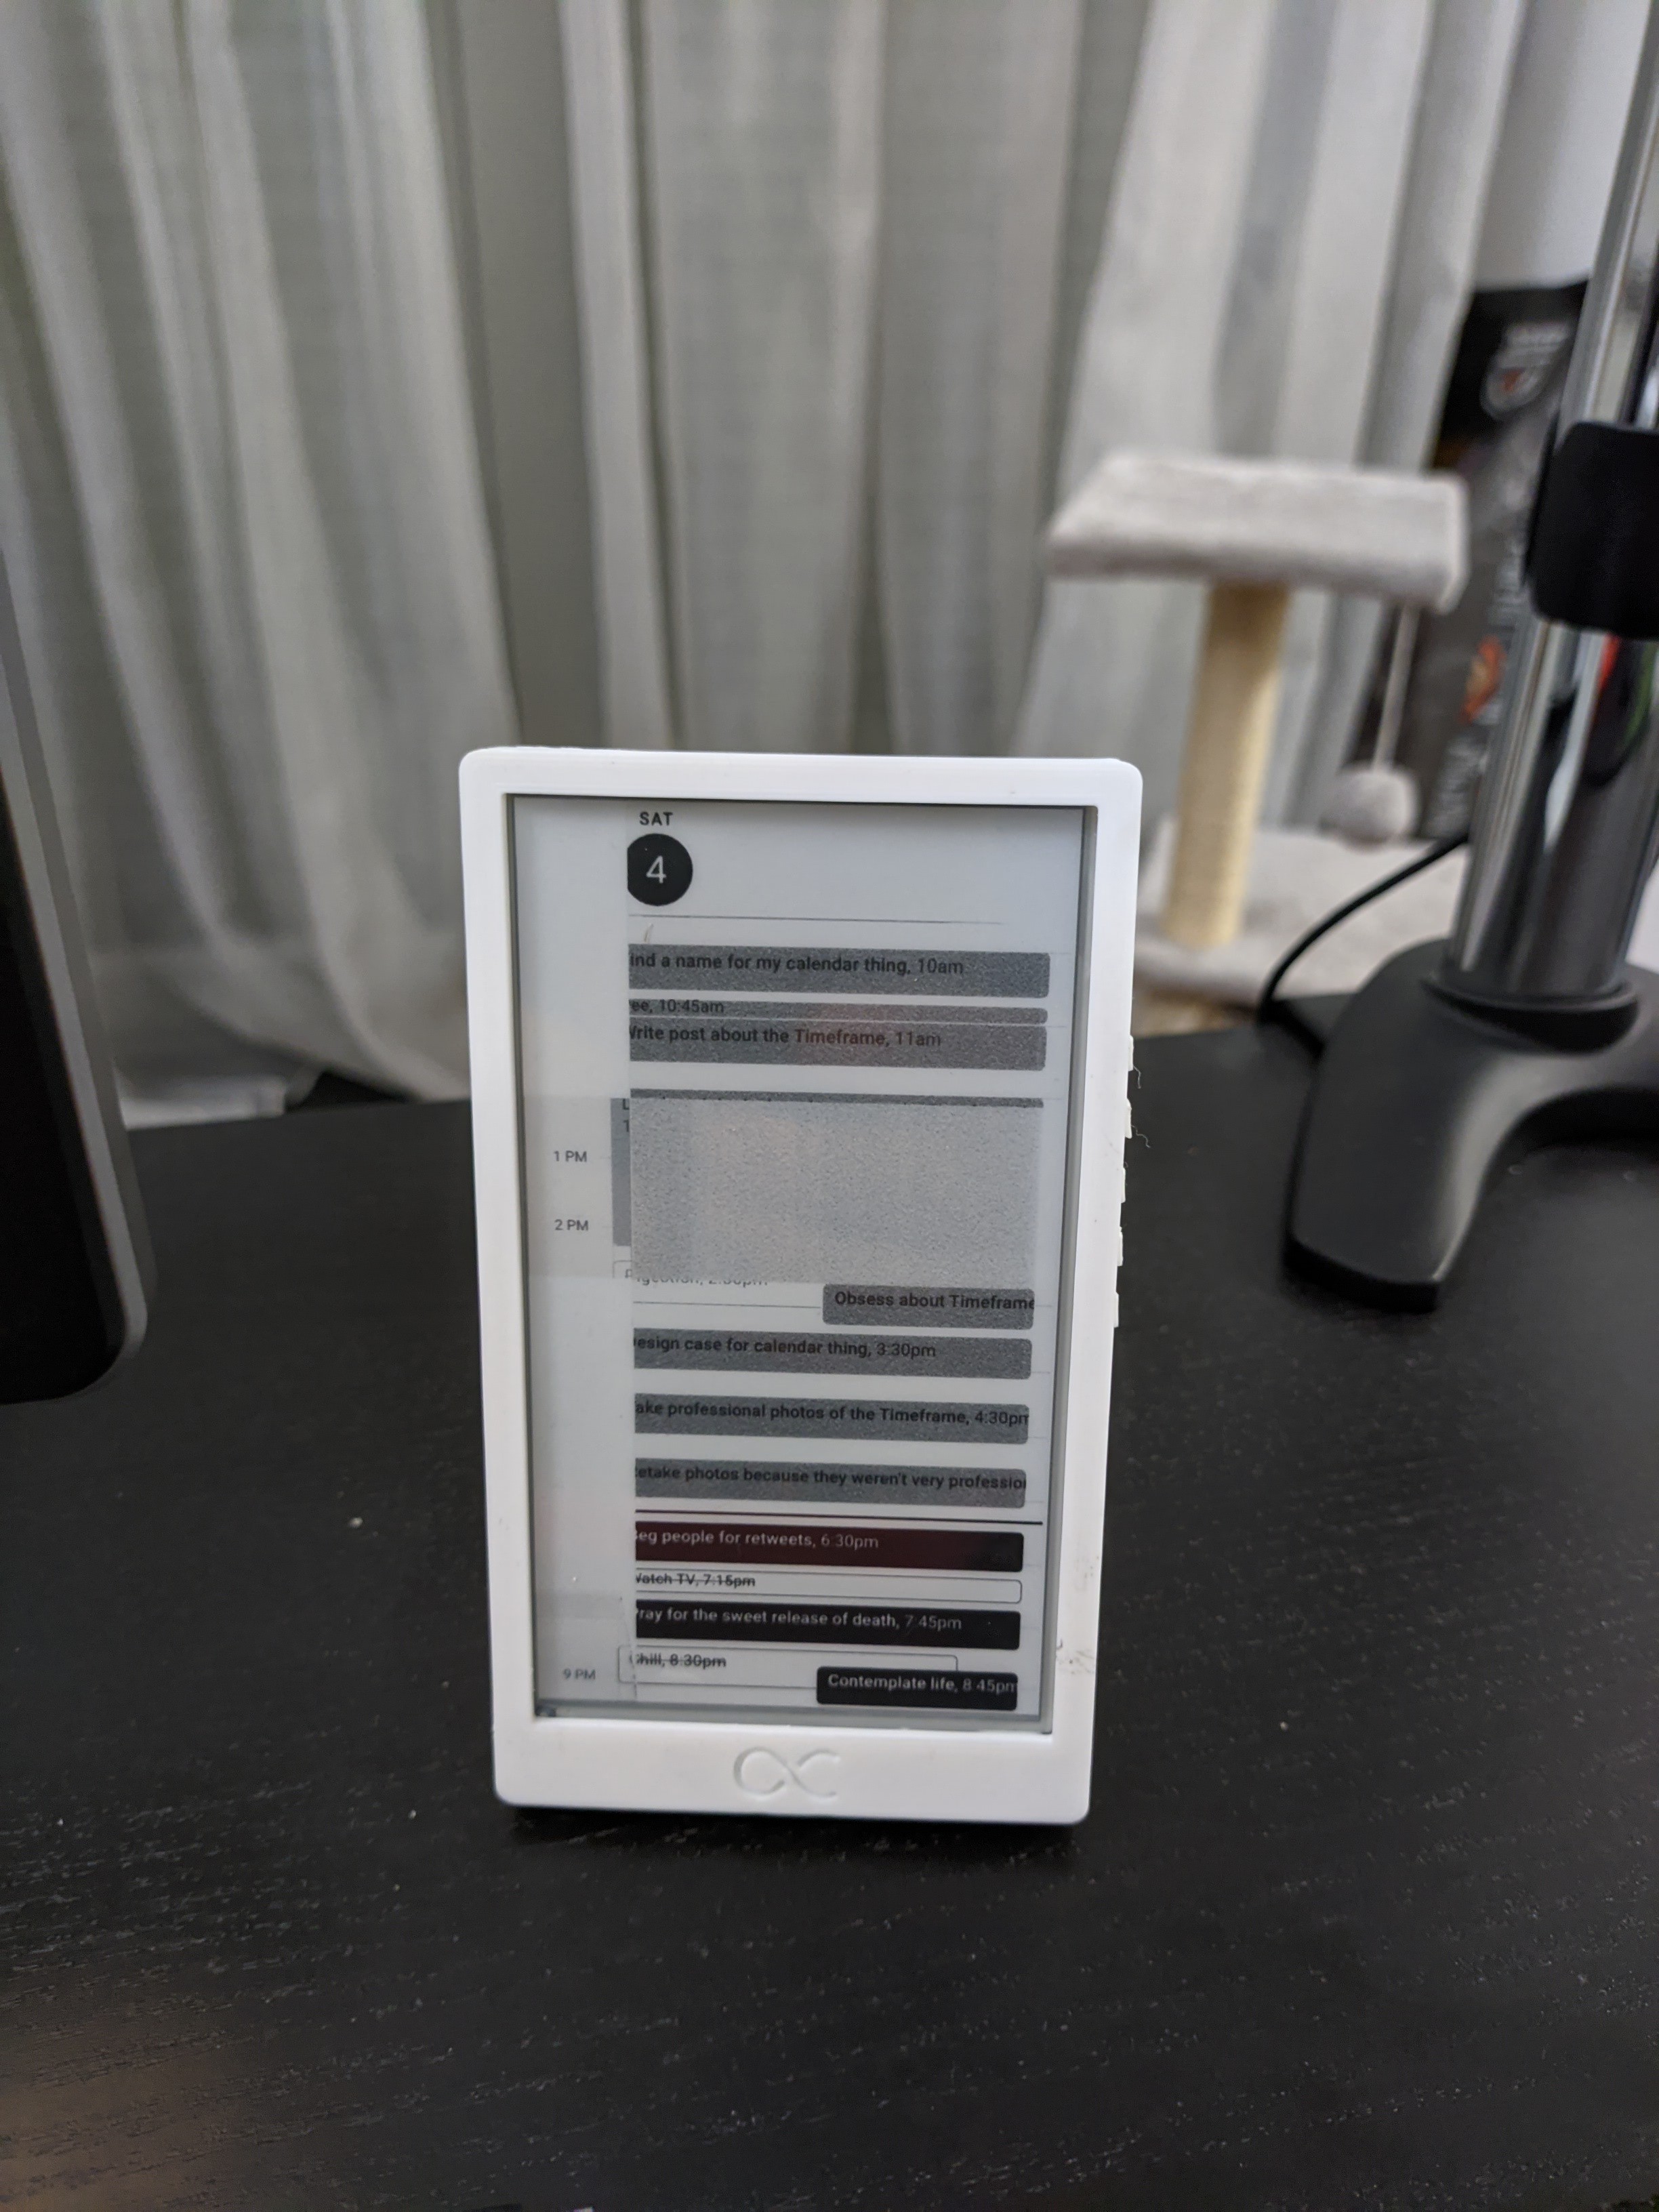
The Timeframe is a beautiful, battery-powered, high-resolution e-ink device that sits on my desk and reminds me of the inexorable grind that saps my creativity and drains me of the will to live. It comes in a sleek, minimal white exterior, reminds you that you’re selling a third of what precious little time you have on this Earth to the highest bidder, and lasts for months on a single charge.
Unfortunately, my C++ skills are abysmal to nonexistent, so it was very doubtful that I could even make something like this. I’m just saying this to build up some suspense, because it’s obvious from the photos that I did build it in the end, and it is glorious.
Let’s see whether I managed to actually make this, which I did, and how!
How I maybe made this
When the screen arrived, my first step was to figure out how to draw things on the screen. That meant I had to do some research.
Some research
I looked into various alternatives:
- There is a custom MicroPython version that looks official. This would have been a fantastic solution to my problem, as I’m much more familiar with Python than C++. Unfortunately, when I tried it, this would fail to draw anything around 80% of the time. I never managed to find out why, so this didn’t work.
- There’s an e-ink library called epdiy, and it includes a very helpful and full-featured example for the LilyGo T5 that uses PlatformIO. Unfortunately, when I tried it, it had some vertical ghosting lines on the screen, which made the image look bad. The official demo that came with the display worked fine, so I knew it wasn’t a problem with the display. It’s a shame that this doesn’t work on my display, because this library is great. I opened an issue with the developer, who confirmed that there’s no issue with his T5, so maybe it’s something with my display? I never found out.
- The official repository contains a working example that uses PlatformIO. It uses a customized version of epdiy that is, unfortunately, fairly old, and doesn’t support all the nice things that epdiy does nowadays, but it works! It’s landscape-only, and in one orientation, whereas the latest epdiy has four, but I decided to try drawing some things and seeing what happens.
Armed with a library that could, at least, change the color of some of the pixels in some ways, I then had to figure out how to actually show a calendar, or some sort of agenda there.
A man, a plan
The main alternatives I could see were two:
One option was to fetch some details from Google Calendar in some way, either fetching an ICS file directly and parsing it on-device, or writing a small proxy that would run on my server and would pre-process the file in some way. Afterwards, I would have to come up with some sort of UI (with my dismal design skills), and draw it on the device, either by drawing lines and text manually, or by using some sort of pre-drawn images and showing those for parts of the elements.
This alternative was very lightweight (it doesn’t require much of a server, as most of the processing and drawing happens on the device), but it would take a lot (A LOT) of C++ code that I wasn’t confident I’d be able to write, and design I wasn’t confident I’d be able to do. Also, it would require some things I wasn’t sure the library could do, e.g. showing things in landscape.
The second option was to make the device download and display an image. This was very flexible, as I’d be able to show anything I wanted (e.g. photos, widgets, anything), and sounded much easier to program, but it would require an external program to somehow generate the images. It didn’t even require the display to be able to rotate orientations, because I could just send it an already-rotated image!
This wasn’t a big problem, and it meant I could do other things with the device outside working hours, such as show photos of rolling hills and calming meadows, to distract me from the fact that I would eventually die never having lived. This was very appealing, so that’s what I decided to go with.
The display firmware
Armed with a basic knowledge of C++, a copy of CoPilot that had as much chance to generate working code as to write insulting comments, and a desire to retire early, I began writing the code. The example included a way to draw something called a framebuffer onto something called a screen, which seemed like it did what I wanted.
A framebuffer is basically a big array of pixels, which you set to the colors you want to set on the screen. You then tell the screen to display this framebuffer, and voila! Your screen has exactly what you wanted to show on it.
With the help of CoPilot, I stumbled my way onto a solution that allowed me to download a file over HTTP, and copy the bytes directly onto the framebuffer. When it worked, I was overjoyed, I finally managed to show some stuff on the screen! I was extremely excited when I saw the first photo appear on the screen, it was immensely gratifying.
The device contacts an HTTP server, downloads the file, displays it on the screen, and then goes to sleep, where it uses basically zero battery. The duration it will sleep for is configurable, I configured it to wake up every half hour to check for a new image. I think this balances responsiveness and battery life pretty well.
Now to make the images to show on the screen.
The server-side script
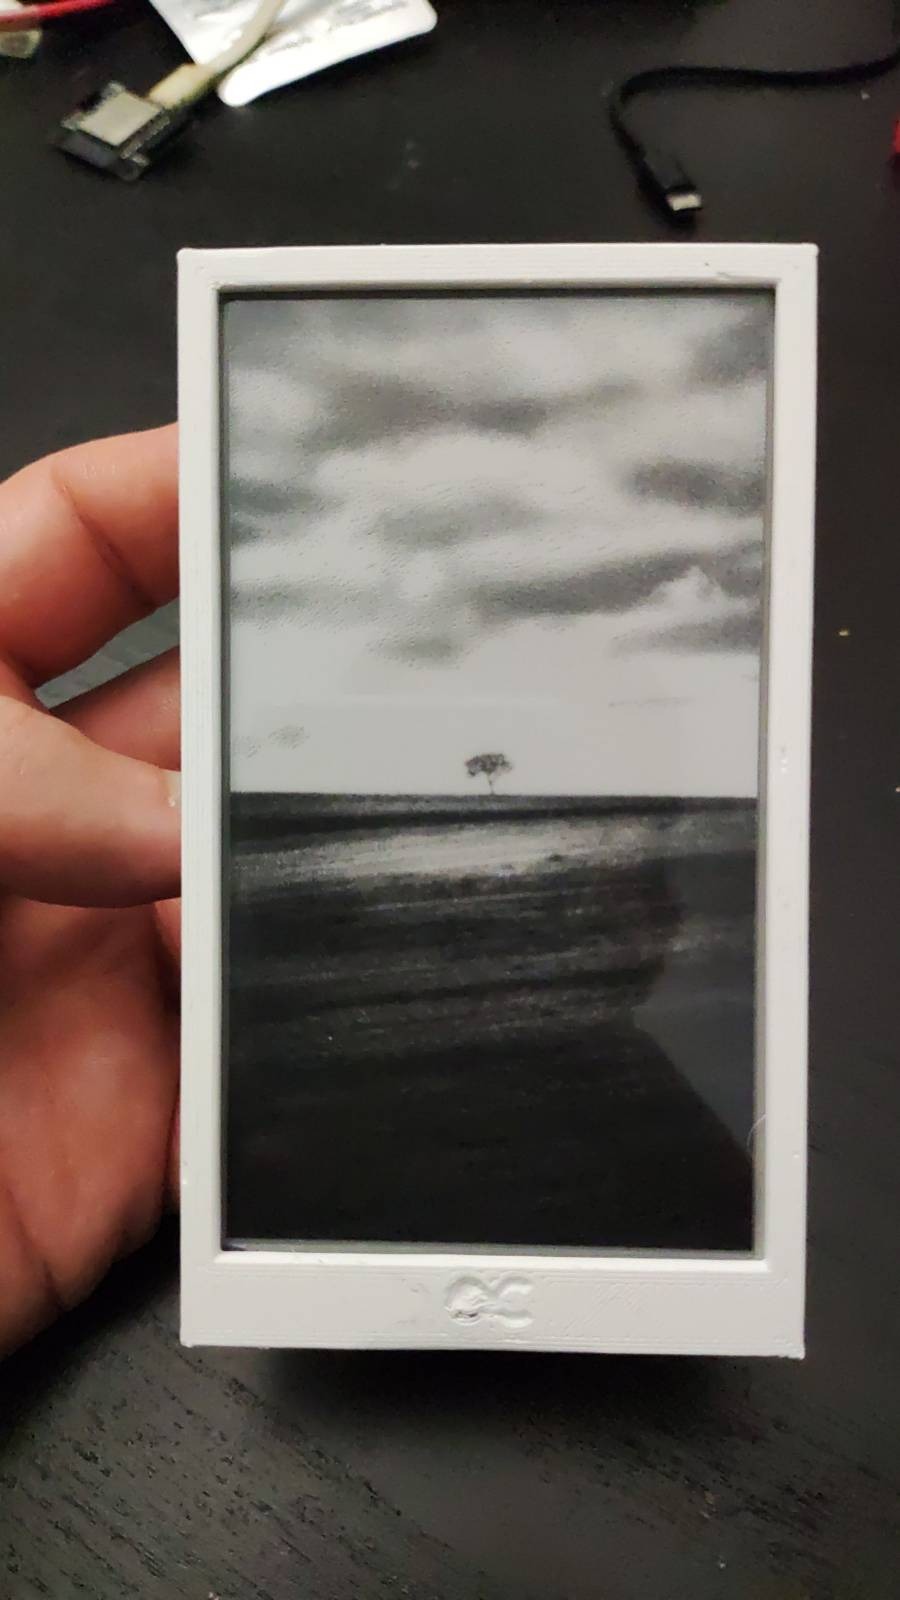
The next thing I needed to do was write a small script to convert images into the raw bytes that the framebuffer could display. This was easy enough to do in Python, and I added some additional niceties like automatic resizing to the appropriate resolution, brightness adjustment, dithering, etc.
The display only supports four grayscale tones grayscale, but dithering is a good way to fake more tones. Dithering basically breaks up your image into dots, and spaces them out to look lighter or darker, depending on how dark your image is. Because this display is fairly high-resolution, the result looks really good. Also, because newspapers use dithering for graphics, the result looks very much like a newspaper.
The script takes an image in various common formats (PNG, JPG, etc), and converts it to the raw bytes that the display can copy to the framebuffer. The resulting file can then be copied to an HTTP server, where the Timeframe can fetch it.
Because I didn’t want the Timeframe to waste battery refreshing the screen every time (not to mention that redrawing the screen is distracting, because it flashes black and white a few times before it draws), I had the script output a second file next to the image. This second file contains the hash of the contents of the image, so I can read that small file and know whether the image has changed or not. I store the contents of the hash file on the Timeframe, and whenever I download the hash I compare it to the previous one. If they match, I know the file didn’t change, and can just go back to sleep.
The calendar view
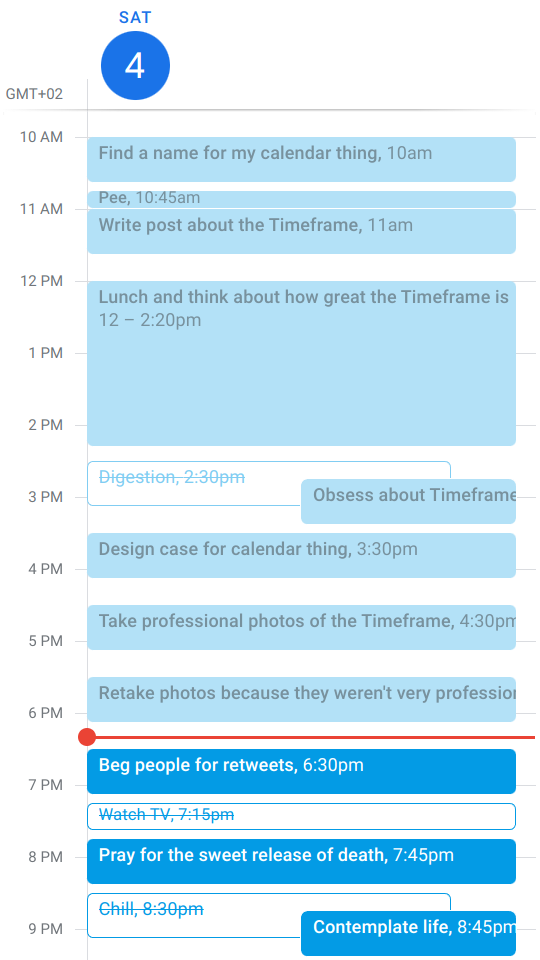
The calendar view is also fairly straightforward. A Python script uses Selenium to visit Google Calendar, switch to the current day, take a screenshot of the browser window, and upload it to the web server for the Timeframe to eventually download.
The hardest part in this is having to log in to Google, because Google really doesn’t like to let you go for too long without reauthentication, which makes sense for security, but hates my use case. Still, though, having to log in every few weeks isn’t such a big problem, and the Timeframe can show me a fun image when Google logs me out, so I’ll never be left wondering why my Timeframe isn’t updating.
I’m very pleased with how easy and repeatable it is to take screenshots this way, and I can programmatically update the Timeframe’s display with the exact part of Google Calendar’s view that I want.
Sure, this whole thing is an unholy abomination of glued-together code and barely-functioning hardware, but damn if it isn’t tons of fun to make.
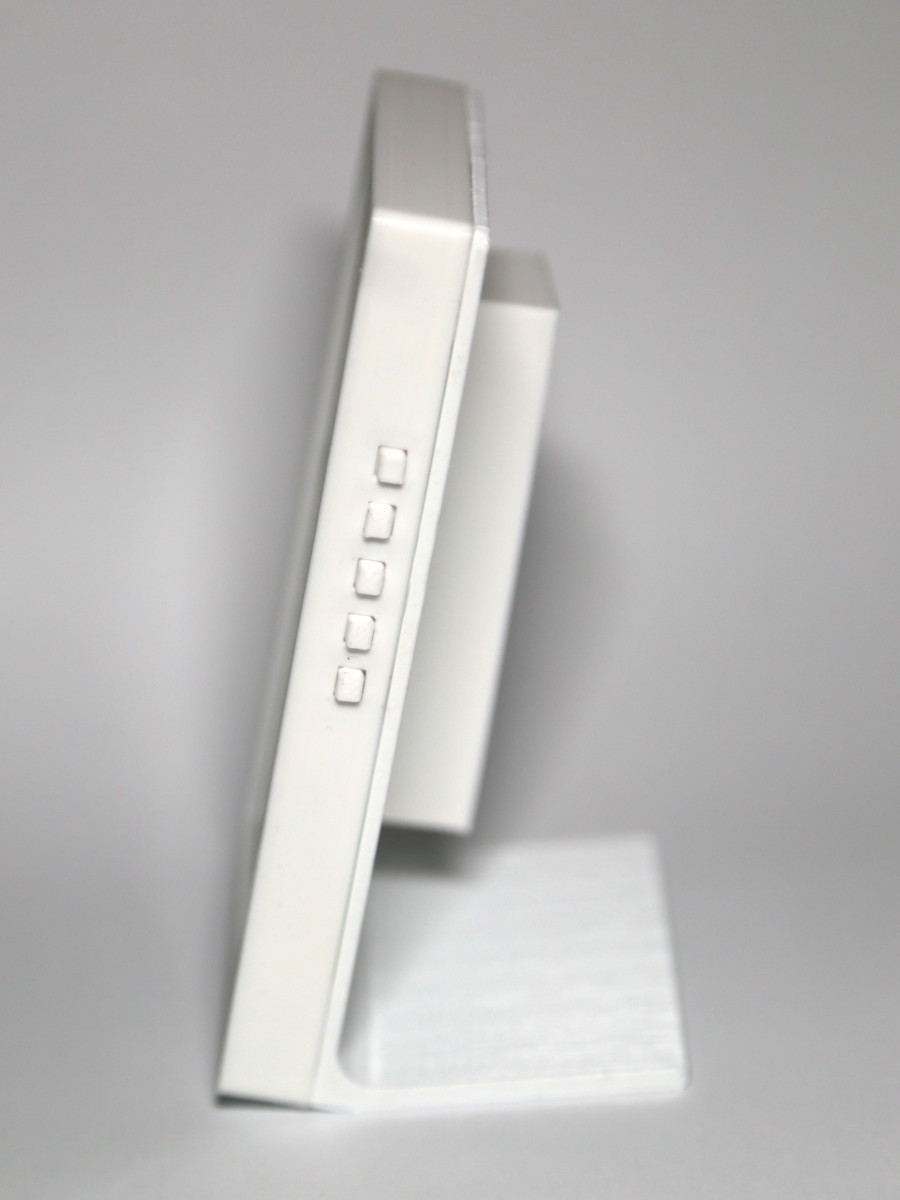
The case
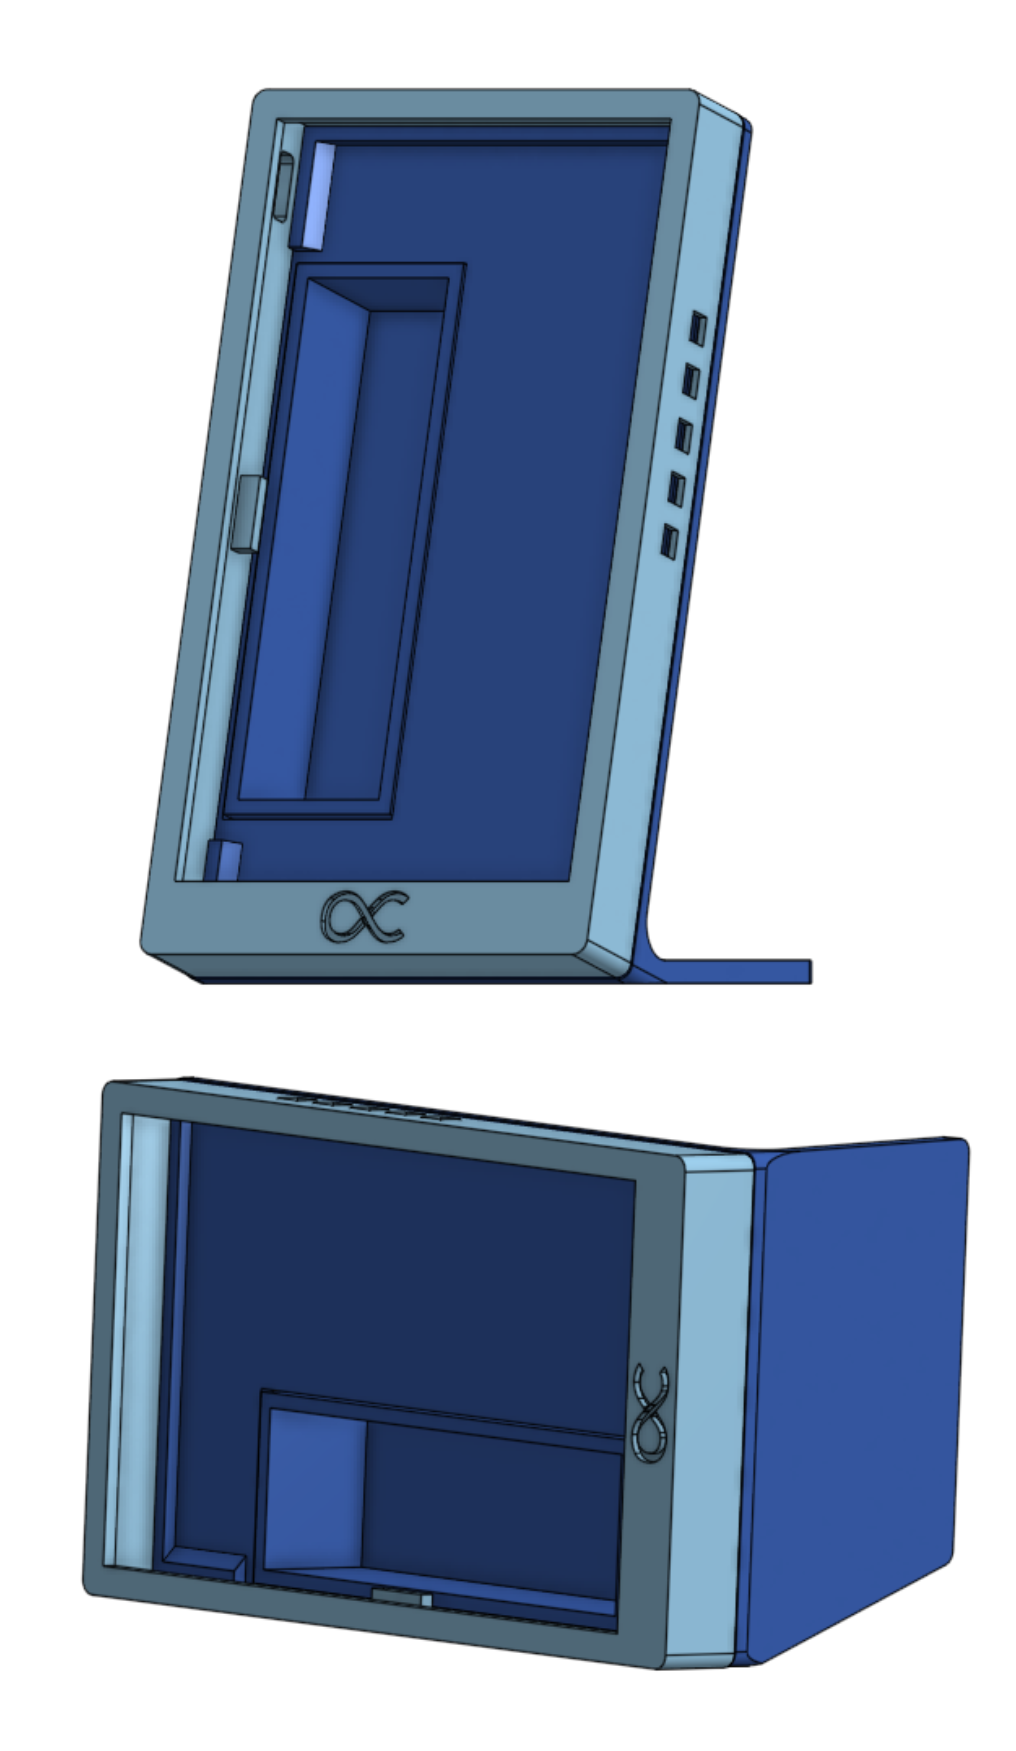
Of course, no project would be complete without a nice-looking case, not to mention that the T5 on its own falls over pretty easily. To make the case, I just put in a lot of time and sweat making everything. There aren’t really many considerations here, except the fact that designing buttons is actually surprisingly tricky, as you need to have enough clearance that you will be able to push the buttons properly, but need to design standoffs so pressing the side of the case won’t press all your buttons.
You also need to go through many iterations to get the fit right, as getting tight tolerances when 3D printing is always hit and miss. After a few hours of designing, printing, designing, printing, and waiting for retirement so I could be too tired and sick to enjoy anything, I had something that fit together reasonably well.
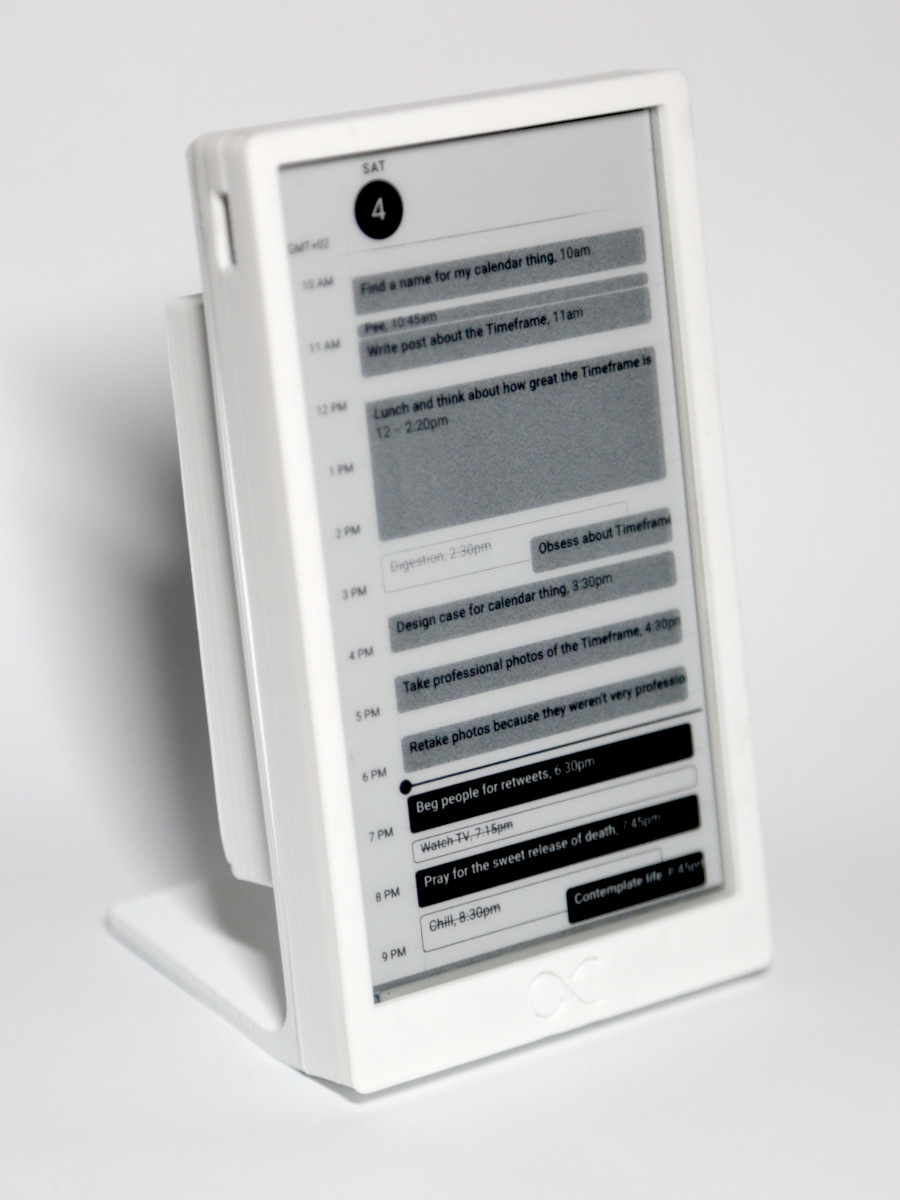
One detail I liked was that I designed the base in such a way that it can be be placed both in a portrait and in a landscape orientation, at a 75° angle. The entire thing can also be 3D printed easily, with minimal supports!
The battery compartment is press-fit, and can easily be removed to change the battery, if you ever need to. You probably won’t need to, because the T5 recharges the battery via the USB port, which is easily accessible on the left side of my case.
The downfall
Unfortunately, when I was trying to install a spacer in the case so that the screen wouldn’t move up and down so easily, I must have pressed slightly too hard, and noticed that the screen had a massive blank spot on the left side. On further investigation, I realized that I had cracked the screen at the bottom, rendering it useless two days after I got it.
I was devastated, not just because this project represented my hope to avoid getting fired, but also because it takes a month for the thing to arrive from China, and that’s the fastest way to get one!
I guess now there’s nothing else to do but regularly turn my camera off during meetings, so I can shed a single silent tear over my grave mistake, and knowing it was me and only me who did this to myself. Verily, that is the burden I must now bear, and bear it I shall, for Amazon Prime is not available in my location.
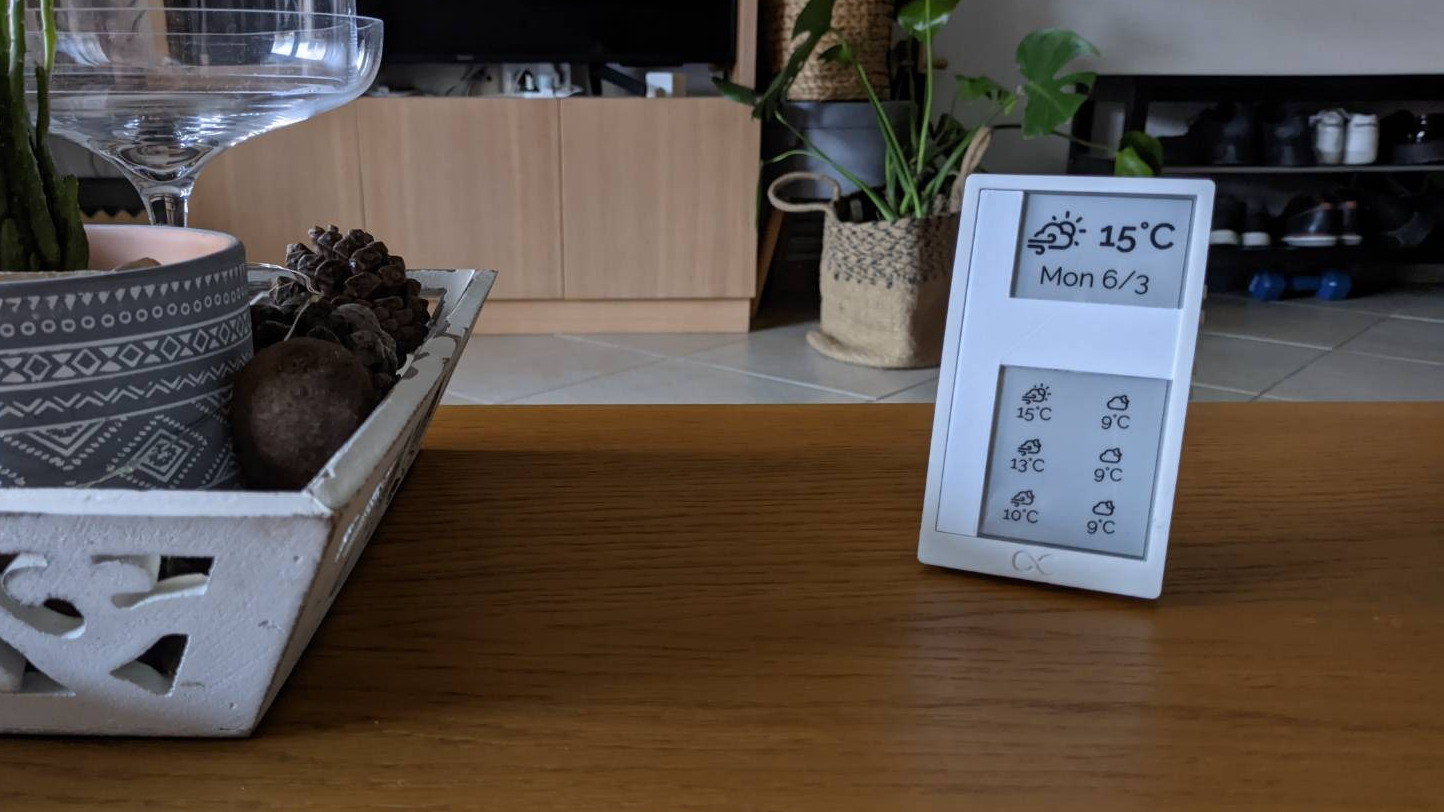
At least, with some 3D-printing, coding, and careful hiding, I managed to repurpose this Timeframe into a weather station. I printed a cover for the broken bits of the screen, and spent some time in Inkscape mocking up a weather display design that didn’t include the broken parts of the screen.
With some help from Pillow and a lot of pixel-counting, I ended up with the display you see on the right. It shows the current weather and date, and a (somewhat confusing) list of the weather for the rest of the day.
It might be broken, but it’s my broken, so I still love it.
Make your own
Let’s face it, up until this part there was only one thing on your mind: How can I get a sweet, sweet Timeframe that I can call my own, and put my soul at ease?
Well that’s pretty easy, it’s on Amazon and AliExpress, and all the code and stuff I made is free and open for you to use, because why not, money has no meaning when you have too much of it.
The code itself lives in a repository, as nature intended:
https://gitlab.com/stavros/the-timeframe
The repository contains instructions, links to buy a T5, more instructions, and all the scripts and software, both for the server and the T5. Isn’t that amazing? Go me, wow.
The case is also available for you to print or remix. I designed it with OnShape, so you can access the source designs online and change them to your heart’s content.
Epilogue
I really loved making this, even though I didn’t get as much sleep as I wanted because of it. Seriously, though, how can I start coding at midnight, look at the clock ten minutes later, and it’s 8 am?! Flow is a very weird thing.
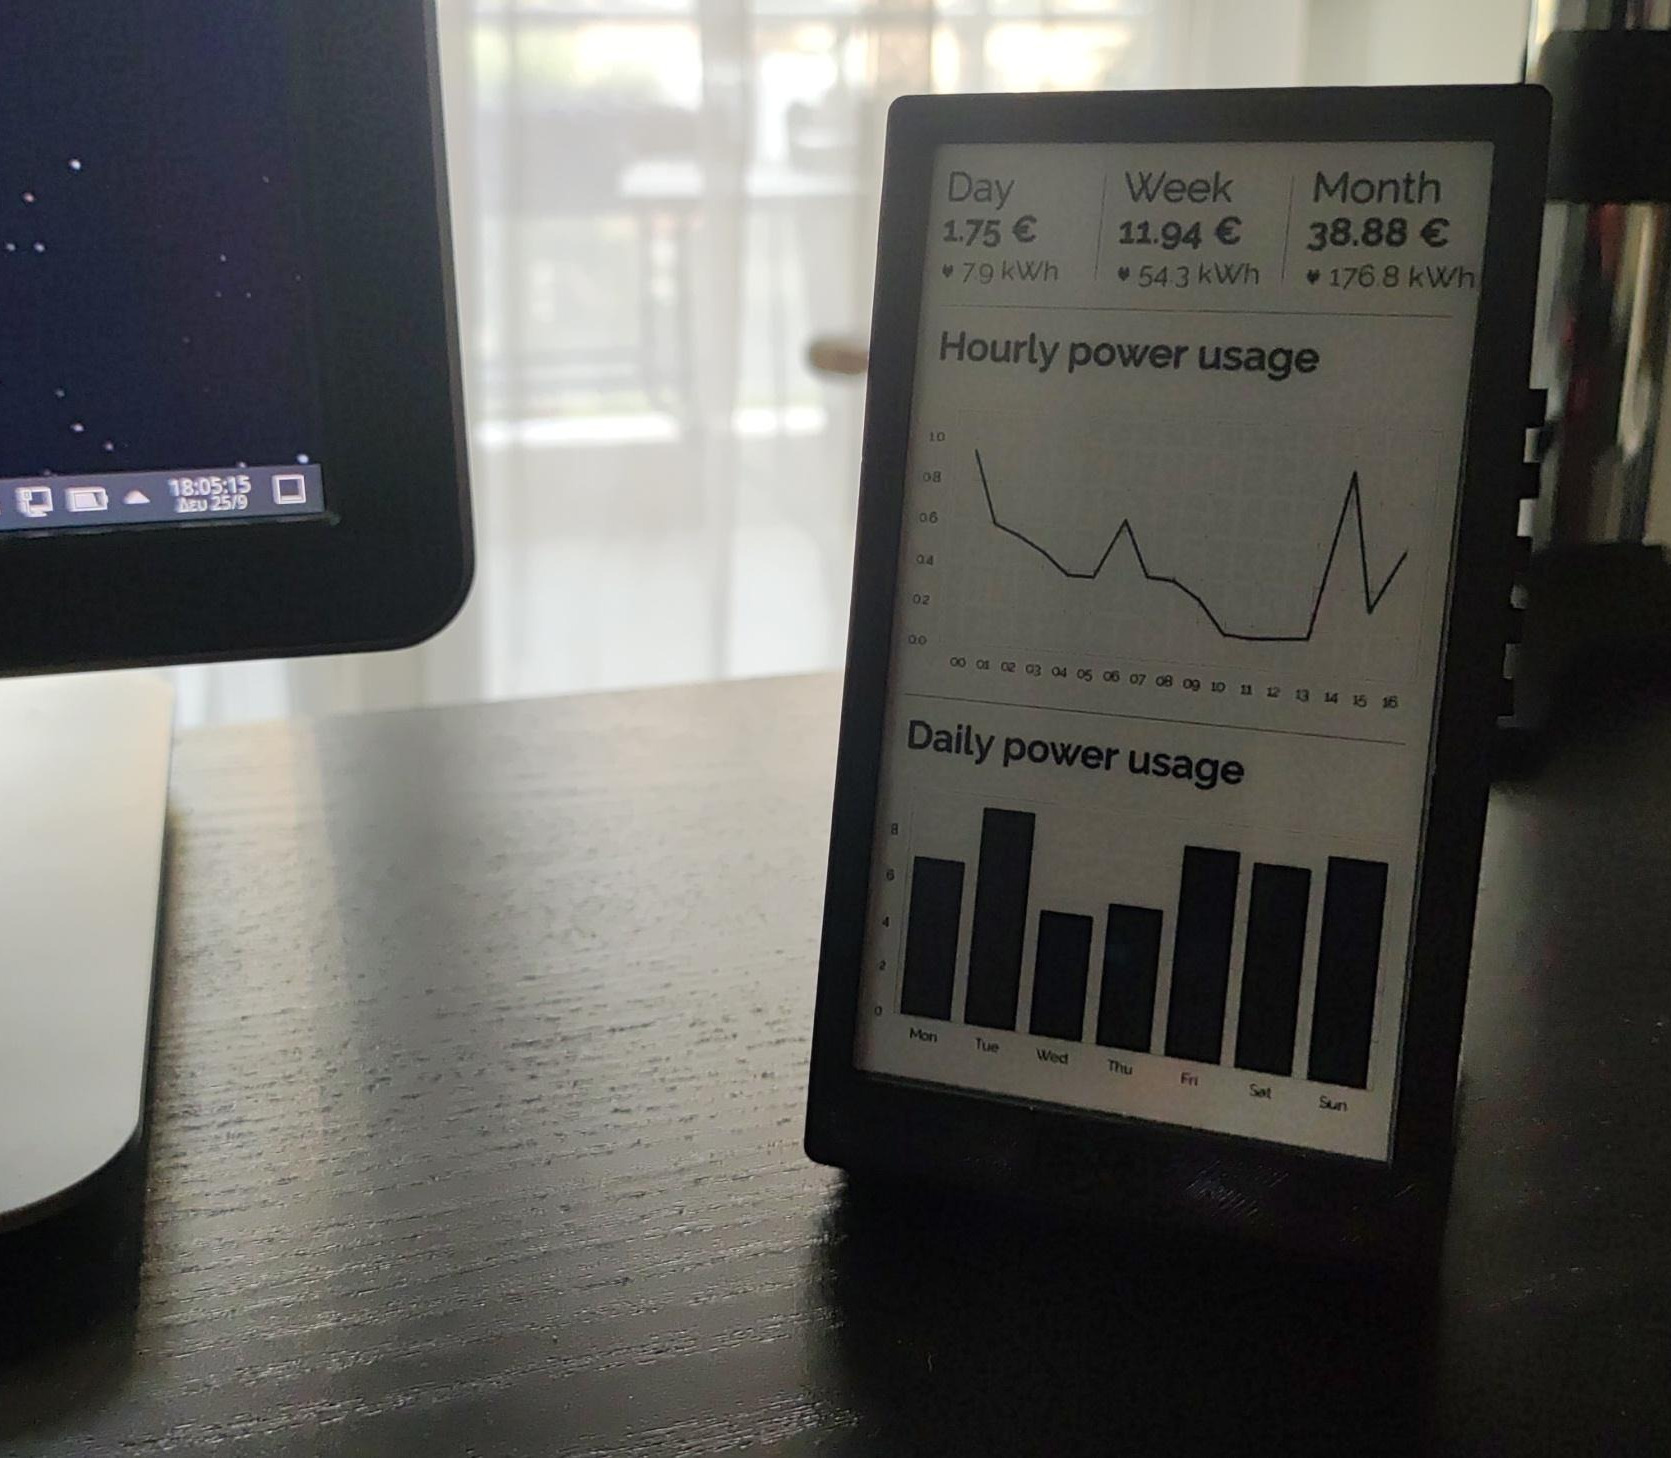
I really like the aesthetic of the e-ink display, and love that it’s wireless and lasts forever. I’m very happy with the flexibility of being able to show whatever image I want, and I think I’ll have a few Timeframes around the house to show various things, from AI-generated art, to dashboards, to smart home statuses.
If you make your own Timeframe, I would very very much like to see it, please Tweet or toot at me, or email me directly. I would also love any comments you might have, or suggestions for improvement.